Payer Authorization
Payer authorization refers to the process of getting pre- or prior- approval from an insurance payer for upcoming medical services or procedures. The health care provider applies for authorization before performing the service or procedure. If approved, the payer will provide an authorization number. Approvals can be for one service (single use) or multiple services (multi use). If the approval is for multi use, the payer will tell you how many times the authorization number can be used. Without payer authorization, the payer could refuse the payment, which could lead to a denial.
Payer authorization fall into a couple of categories:
- Payers that require a prior authorization for every transport regardless of level of service: Set an authorization requirement at the payer's policy level (done in Admin). When set, you cannot complete a claim without entering the authorization number in the claim's coordination of benefits tab.
- Payers that require a prior authorization for some transports but not all: Don't set an authorization requirement at the policy level. Instead, enter the prior authorization number as needed on the claim's coordination of benefits (COB) tab.
To enter a prior authorization for an existing claim, go to the Claim page > COB tab.
Select the level of service requiring prior auth
- On the navigation bar, click Payers.
- On the list of insurance providers, click the payer's name. To quickly find the name, start typing it in the box under the "Payer name" column heading.
- Click the policy or the Benefit plans tab.
- Click the policy or benefit plan name.
- Click the Primary authorization requirements field and select one of more level of service.
- Click Save.
Adding an authorization to the claim
Authorization numbers can be entered during claim creation or anytime on the Claim page.
Don't have the required authorization?
If you have configured the payer so that you must enter an prior authorization number for a given level of service, you can create the claim but can't submit it until one is provided. The claim will go into a suspended status when completed.
How to apply an authorization to a claim
You have the authorization number from the payer and now it is time to add it to the claim on the COB tab.
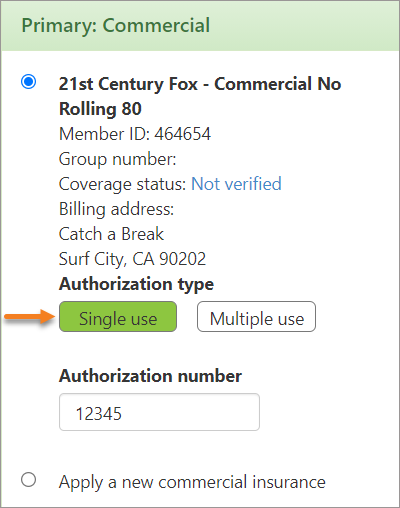
Single use
-
From the "Coordination of benefits" tab on your claim, click the Single use tile under "Authorization type."
-
Enter the authorization number for the individual claim.
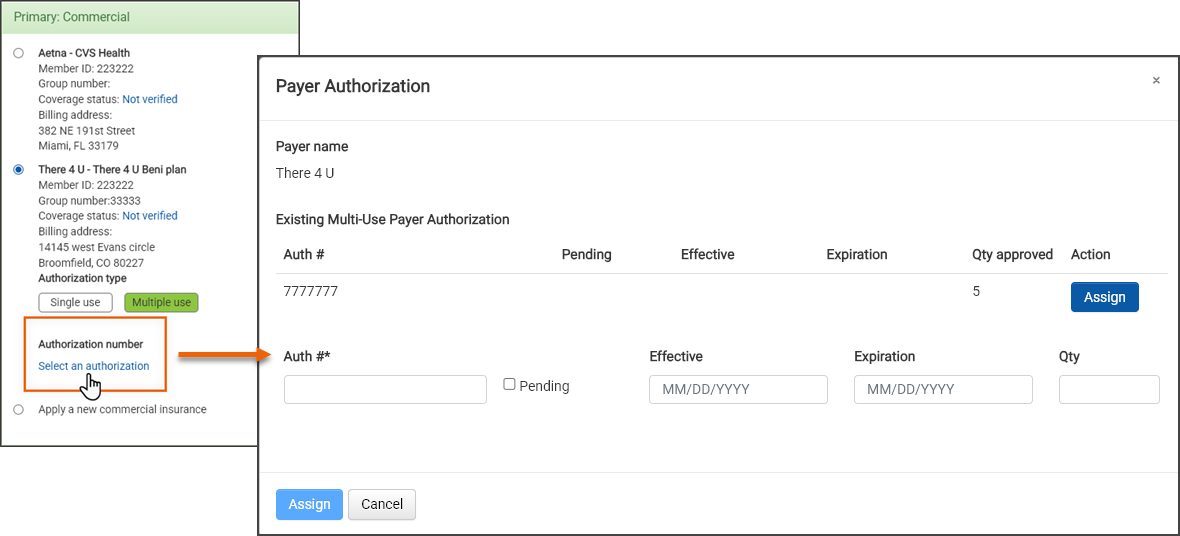
Multiple use
-
On the COB tab, click the "Select an authorization" link to open the Payer Authorization window.
-
If there are any multiple use authorizations entered on the patient's account page they display in a list on this window. Click the Assign button on the line of the correct authorization number. If the authorization number is not on the list, you can add one by typing the number in the "Auth #" field. In this case, when you click Assign, it will add the newly entered authorization number to the claim.
Uploading multi use payer authorizations via a file
Create a file containing a list of multi use payer authorizations that you can upload into ZOLL Billing.
Create the payer authorization import file
-
On the navigation bar, click Claims and then select Authorizations/PCS.
-
The file must be structured in a certain way so we give you an example CSV file that you can use or follow.
-
Click Upload authorizations and then Example CSV Import File.
-
After the file downloads, open it and delete the existing information. As you start entering the authorization information, keep in mind that they must be for one payer and one benefit plan - no mixing payers or plans within the file. Before you upload, you will select which payer and plan the authorizations are for.
The following data will be needed for the file:
-
Member ID: This is also call subscriber ID. You enter this ID on the COB tab when you select the payer. You can also find it by going to Admin > Billing > Insurance. Select the insurance from the list. The Member ID is a required field on that page.
-
Patient name
-
Patient DOB
-
Patient sex
-
Approval number
-
Quantity
-
Active date - date from and date to
-
-
When you are done, save this file with a different name someplace on your PC or network.
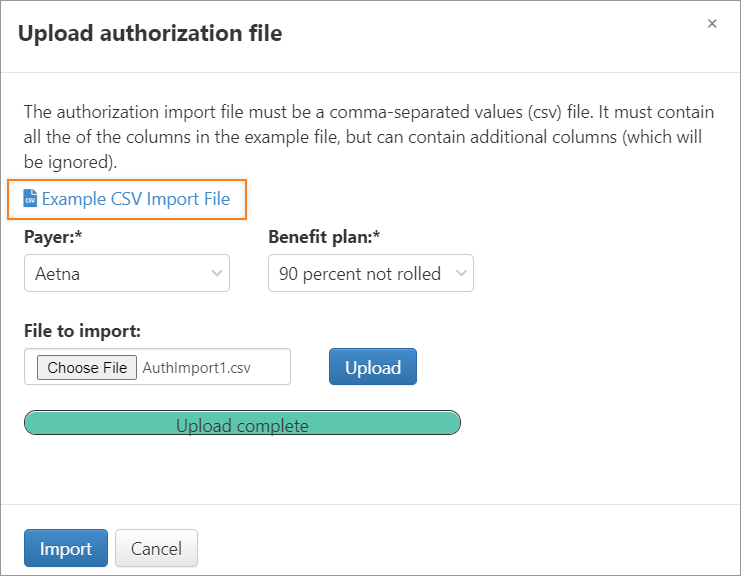
Import the payer authorization file
-
On the navigation bar, click Claims and select Authorizations/PCS.
-
Click Upload authorizations.
-
Click the payer field and select the payer.
-
Click the benefit plan field and select the benefit.
-
Click the File to import field and browse to the CSV file location.
-
Click Upload.
-
After the file successfully uploads, click Import.
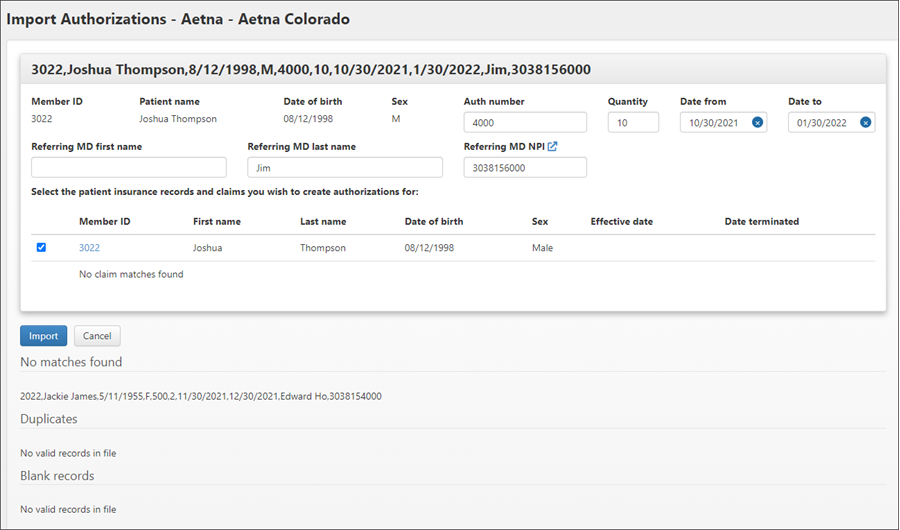
When you import authorizations, patients are matched based on the payer + benefit plan selection and the member ID. The patient name, gender, and date of birth are not considered.
Note: The system matches claims to the imported data only if the date of service falls within the "Effective date" and "Expiration date" range and the number of claims do not exceed the number in the Quantity field (if the Quantity field is populated).
After the import, the Import Authorizations page lists patients and claims to which the new authorizations will be applied. This page also displays imported lines with no matches, duplicate rows, and entries with no authorization number. You can use this information to correct the import file.
Note: The 'Will queue' column indicates that the claim’s status is currently "Suspended - Primary auth pending." The claim will be taken out of the suspended status and queued for submission upon completion of the import process.
Each entry is checked for import by default. If you don't want an entry to import, uncheck the box before you click 'Import' on this page.
-
Click Import to apply the authorizations to the claims.
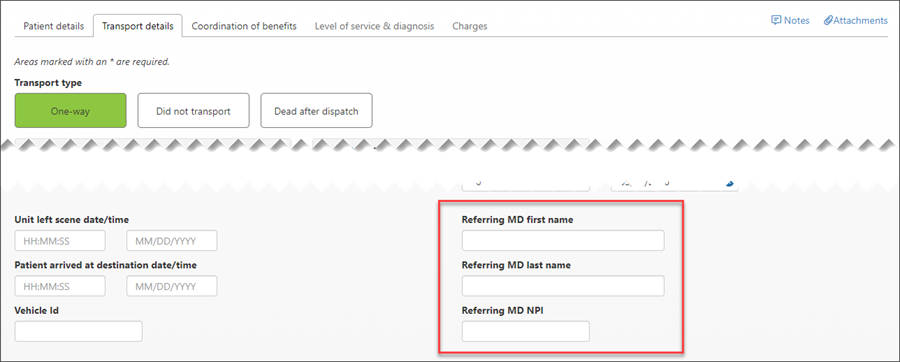
A couple of things to note about the Referring MD fields:
-
When imported as part of a payer authorization, the Referring MD values are captured on the "Transport details" tab on incomplete claims and on the "Incident details" tab on completed claims.
-
Values can also be entered manually.
-
The referring physician name and NPI values are also now output in boxes 17 and 17b on the 1500 paper claim form, as well as in fields 65 and 68 on the electronic claim submission file.
-
Patient authorizations
View multiple use payer authorizations for a patient account
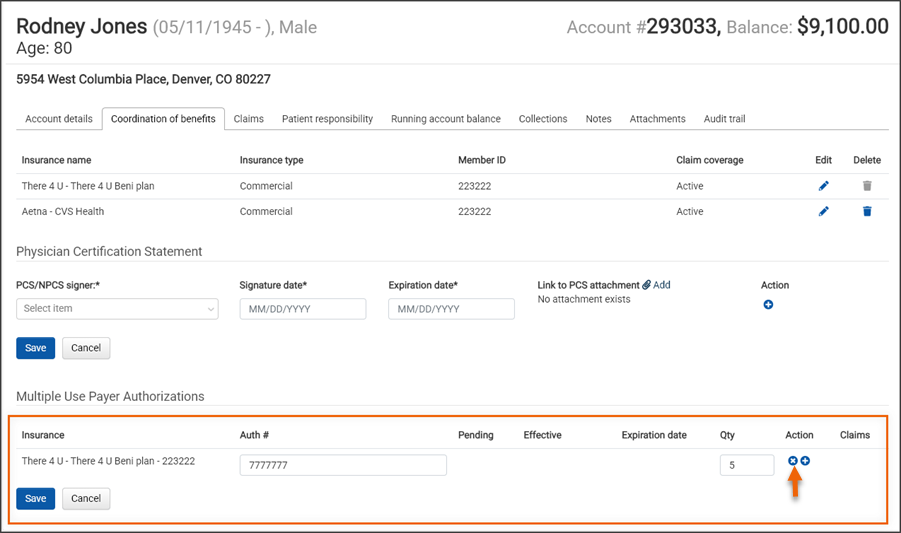
Multi use payer authorizations for the patient account displays at the bottom of the "Coordination of benefits" tab on the Accounts page.

Add a multiple use payer authorization to the Account page
-
Go to the patient's account page.
-
Click the "Coordination of benefits" tab.
-
Insurance: Under the "Multiple Use Payer Authorizations" heading, click the Insurance field and select the insurance from the list. An insurance must have been used by the patient to display in this list.
-
Auth #: Enter the auth number. If you do not yet have a number, click the "Pending" box.
-
Effective and expiration dates: Enter the start date for the authorization. If the prior auth expires, enter the expiration date.
-
Qty: Enter the quantity - how many times the prior auth can be used within the effective dates.
-
To add an additional authorization, click the plus sign.
-
When you are done, click Save.
Delete a multiple use payer authorization for a patient account
Multi use payer authorizations for the patient account displays at the bottom of the "Coordination of benefits" tab on the Accounts page.
Viewing authorizations
On the navigation bar, click Claims and then select Authorizations/PCS. The Authorizations/PCS page displays a list of all multi use payer authorizations in your system and important identifying information about each authorization. You can navigate to each patient account as well as to the list of claims (the link displayed in the "Quantity used" column) to which each authorization is applied. This table can be filtered, sorted, customized, and exported to a CSV file.
-
Upload authorizations: Click to upload authorizations into ZOLL Billing from a CSV file.
-
Customize columns: Click to add or remove columns of information from the chart.
-
Download CSV: Click to download this chart to a CSV file. The download respects the column customization - only those that display will be downloaded. If you are not that familiar with how to use Excel, go here for some tips on how to manipulate the data.

Note: The system automatically calculates the "Quantity used" and "Quantity remaining" values based on the number of claims to which the authorization is applied (Quantity used) and then subtracts that number from the "Quantity approved" (Quantity remaining).